
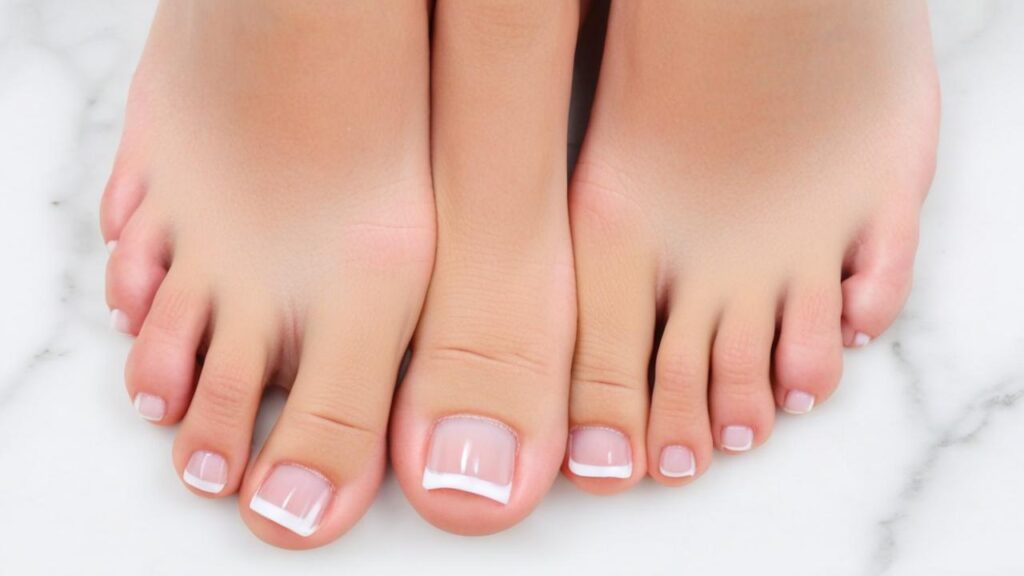
Pedicures are more than just beauty treatments; they’re also good for your feet! A professional pedicure will remove odor-causing bacteria, dead skin cells, and calluses while increasing circulation for improved blood flow and enhanced foot health.
At first, trying your own pedi at home may seem daunting, but the process is much simpler than expected. Just follow these simple tips for a spa-quality pedicure for your feet.
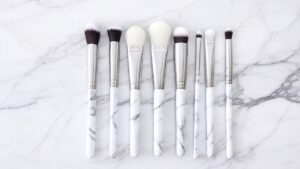
Prepare Your Supplies
Do your best to prepare before arriving at the nail salon; doing so will lead to more satisfying and effective services. Have your supplies, including candles and soothing music, to create an ambiance for a DIY pedicure station at home.
Fill a tub or foot spa large enough to hold both feet with warm water and add soothing ingredients—like sea salt and eucalyptus essential oil—for extra relaxation. Sundays’ founder recommends this.
Soak your feet for 10 minutes or so, and use a manicure stick or orangewood stick to gently push back the cuticles with your manicure stick or orangewood stick. Don’t cut your cuticles; doing so could result in damaged or ragged nails; leave this task for professional nail techs instead. After massaging some cuticle oil, such as Essie Apricot Cuticle Oil, to keep nails healthy, apply a base coat to prevent chips in the polish later.
Soak Your Feet
Starting any good pedicure is with an effective soak, designed to soften tough skin and cuticles for easier grooming steps ahead. Fill your favorite pedicure basin (or regular bathtub) with warm water, adding soothing bath salts or essential oils like tea tree oil for an enhanced experience.
Once soaked, use a gentle soap or foot cleanser to scrub away dirt and dead skin cells that have accumulated after soaking. This will aid the next steps more smoothly while also helping prevent infections or fungal growth between salon visits.
An alternative option for at-home foot soaks is mixing vinegar with warm water. This antimicrobial foot soak leaves skin feeling fresh. Just be sure to rinse away and dry completely afterward!
Trim and Shape Nails
Trim your nails to the length you prefer using nail clippers and file. Choi recommends trimming long nails to resemble their natural shape (usually somewhere between round and pointed) to reduce the risk of ingrown toenails as they grow longer.
Once your nails have been trimmed, use a nail file to gently soften their edges and prevent any bumps or snags from forming under your polish. Doing this will also help avoid any unwelcome bumps emerging during painting sessions.
Once filed, use a cotton ball saturated in non-acetone nail polish remover to cleanse each nail of any oils or residue that could prevent its polish from adhering properly. Although this step is optional, it will ensure your pedicure lasts as long as possible. Finish it off by applying a base coat that prevents any color from chipping too soon before adding a clear top coat; one that contains shea butter and avocado oil might even make this more durable top coat option an even better idea.
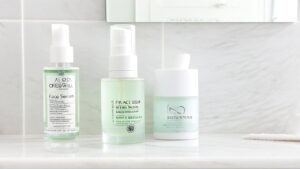
Care for Cuticles
After completely drying your nails, apply a thin coat of cuticle oil. This step helps prevent your polish from chipping prematurely; nail oils can be found at beauty supply stores or drugstores; however, basic vegetable oils (olive, jojoba, or apricot oil are suitable alternatives). Using darker nail polish hues is essential since staining or yellowing could occur otherwise.
Cuticles are small strips of skin found at the base of your nails between your lunula and eponychium that contain living skin cells. It’s important to properly maintain and care for your cuticles to avoid bleeding, ingrown toenails, or infection from cutting them or over-filing. Instead, Yankee recommends gently pushing back skin with a soft pusher; any too harsh could cause microtrauma; gentle pumice stone scrubbing can also be an effective alternative to harsh grater styles like harsh graters – gentle pushers don’t hurt either!
Exfoliate and Smooth Skin
Pedicures may be best known as relaxing spa experiences. Still, they also serve a practical purpose: pedicures can trim and shape nails, remove calluses from feet, and clean both skin and nails simultaneously.
Regular pedicures can help protect and promote the health of feet by helping to avoid infections and detect any changes or abnormalities in their appearance.
Avoid overexfoliating your skin to protect its delicate structure. Exfoliate only as needed to shed dead skin cells and soften your feet; excessive exfoliating could result in irritation, redness, and even cracking of the foot skin.
Use a foot scrub or exfoliating brush to eliminate dead skin and calluses on your feet. Beware of using razors or other tools that could cut into the soft skin of your feet! Once exfoliating is complete, be sure to moisturize your feet using something such as Adessa-30 Heel Liniment, which contains shea butter, jojoba oil, and other essential oils to hydrate them further and maintain their suppleness.
Moisturize Your Feet
While you soak your feet, apply a thick body lotion with rich nutrients to your toes and ankles to keep skin hydrated after all the scrubbing and soaking and smooth rough spots and calluses. This will also help soften rough patches on callus-prone spots!
If you’re in a rush, an esthetician such as Leanne Fagan suggests using a nail polish remover pad saturated with rubbing alcohol to quickly clean each nail surface, suggesting this product is a quick, safe, and efficient way to use at home.
Once your nails are dry, Brittney Glass recommends applying a layer of cuticle oil. This will hydrate your cuticles and extend the color of your pedicure – it should also help hydrate feet that may have become rough over time! She suggests choosing one from a wellness brand packed with essential fatty acids for soft, healthy feet.
Prep Nails for Polish
At-home pedicures require polish as the last step, with several layers applied before proceeding to prevent clumping and streaking. Applying cuticle oil before painting your nails can also help keep them from lifting, explains esthetician Sana Dhanani.
She recommends applying oil with a cotton pad (not a ball) and leaving it for 60 seconds before pushing back cuticles using either metal or wooden nail pusher sticks. You can also use nail nippers to cut away dead skin around nails–just be careful not to accidentally damage live tissue!
Filing your nails properly means filing them straight across rather than rounded, which could lead to ingrown toenails. If you have trouble with calluses, try using a foot file that will smooth away rough skin without being too harsh on your nails. Once finished, seal off your pedi with a quick-drying top coat for protection and long-lasting beauty!
Apply Nail Polish
As the final step of your pedicure, apply a top coat. This will extend its durability while giving it an exquisite, shiny finish.
Provided you have all the supplies, performing a DIY at-home pedicure is as straightforward (if not simpler!) as getting it from a nail salon. Lin recommends keeping nail clippers, files, cuticle oil, polish remover, and some beautiful springtime nail colors handy to complete this experience.
An extra bit of preparation goes a long way: before painting your nails, use a cotton pad soaked in rubbing alcohol to wipe down each surface and remove any oily residue that could prevent the polish from adhering properly. You may also add cuticle oil as part of this step to extend its effectiveness even more.
Once your feet are clean and dry, apply a generous dollop of moisturizer. Massage them for several minutes to promote circulation and help the moisturizer absorb into their pores faster.

you are in point of fact a just right webmaster.
The site loading pace is amazing. It seems that you’re doing any distinctive trick.
Also, The contents are masterwork. you’ve done a fantastic process in this matter!
Thanks for finally talking about > How to Give Yourself a Pedicure
– LIFESTYLE ECHOS < Loved it!
Do you have a spam problem on this site; I also am a blogger,
and I was wondering your situation; we have created some nice
procedures and we are looking to trade methods with others, be sure to shoot me an e-mail if interested.
I’m not sure why but this weblog is loading incredibly slow
for me. Is anyone else having this problem or is it a issue on my end?
I’ll check back later on and see if the problem still exists.
Oh my goodness! Awesome article dude! Thanks, However I am experiencing issues with your
RSS. I don’t know why I am unable to join it.
Is there anybody else having similar RSS problems?
Anyone who knows the answer can you kindly respond?
Thanx!!
Hi, i think that i saw you visited my weblog so i came to “return the favor”.I am trying to find things to improve my site!I suppose its ok to use some of your ideas!!
I was curious if you ever considered changing the layout of your site?
Its very well written; I love what youve got
to say. But maybe you could a little more in the way of content so
people could connect with it better. Youve got an awful lot of text for only having one or 2 pictures.
Maybe you could space it out better?
I visited many web sites but the audio feature for audio songs present at this website is truly fabulous.
Thank you, I’ve just been searching for information approximately this topic for a long time and yours is the
greatest I have came upon till now. However, what about the conclusion? Are you
certain about the supply?
Hello There. I found your blog the usage of msn. This is an extremely neatly written article.
I’ll make sure to bookmark it and come back to learn more
of your helpful info. Thank you for the post. I’ll definitely comeback.
I go to see daily some sites and blogs to read articles, except
this web site presents quality based writing.
This is a very good tip especially to those new
to the blogosphere. Simple but very accurate info… Many thanks for sharing this one.
A must read post!
Quality articles or reviews is the main to be a focus
for the users to visit the web site, that’s what this site is providing.
Hello mates, its impressive article regarding tutoringand completely
explained, keep it up all the time.
It’s very straightforward to find out any topic on net as compared to textbooks, as I
found this paragraph at this site.
Spot on with this write-up, I seriously believe this website needs much more attention. I’ll probably be back again to
read more, thanks for the info!
What’s up everybody, here every one is sharing such
familiarity, so it’s pleasant to read this website, and I used to
pay a quick visit this website all the time.
Excellent post! We will be linking to this particularly great article
on our website. Keep up the good writing.
Does your site have a contact page? I’m having problems locating it but, I’d like to send you an e-mail.
I’ve got some creative ideas for your blog you might
be interested in hearing. Either way, great site and I look forward to seeing it develop over time.
It is a common simple fact that our tradition indicates that
the even larger the penis, the greater. The widespread
scene that has appear to the forefront of healthcare troubles
these days is the unsuccessful erection attempt. Then in between training days on the resting and therapeutic times try to obtain an erection.
The anatomical function of a man’s erection starts off
with the heart and carries on down to the shaft of
the penis and the bladders held in. Then, shift your grip down the
penile overall body to its head, releasing your grip just before achieving it.
As we all will have to remember and regard that this is your physique
and this is your penis and this is your penis enlargement alternative.
Warnings need to be heeded and instructions should be adopted to the tee for any
kind of penis enlargement training that you are about to entertain. Whether tasteful or
not, we cam think a couple of minimums about grown ups: they are normally somewhat civilized, fairly mature about
undesirable language, typically in touch with their own sexuality, and have come to discover
that religion and politics are tough business.
Take a look at my blog; sex Naked Women