
It’s always a great idea to try and contour your face in order to enhance your look. However, it can be tricky to contour your face properly and without issues. That’s why I am here to help with some creative, engaging and helpful contouring tips. Here’s what you need to know about contouring, along with the right tips to help you get started.
Why is contouring a great idea?
Contouring is one of the most interesting makeup techniques that you can try. The main focus is to try and manipulate shadow and light in order to define and enhance your look as a whole. Generally, you want to work with darker shades and apply them to receding areas. You can use lighter shades to protruding areas, including brow bones and cheekbones. Not only that, but if you start contouring your face, you will make it look slimmer, as well as symmetrical. It’s also a nice approach if you’re looking to add some dimension and depth.
Should you contour after applying foundation?
Based on our experience, you can either contour your face either before or after you apply your foundation. It’s always up to you, although the general practice is to try and apply foundation first. As you do that, you get to create a very good base upon which you can start contouring. I also like the idea of adding foundation first because it gives a bold and sculpted look.
Sometimes, the contouring makeup can end up diffused within the foundation. That’s something you can avoid if you have your foundation applied first. In case you still want to contour your face first, you can use a system called underpainting. You apply your contour and then your blush, and after that you blend the foundation. Even if the result is not as impressive, it does provide a natural look, which a lot of people are looking for.
What items do you need to contour your face?
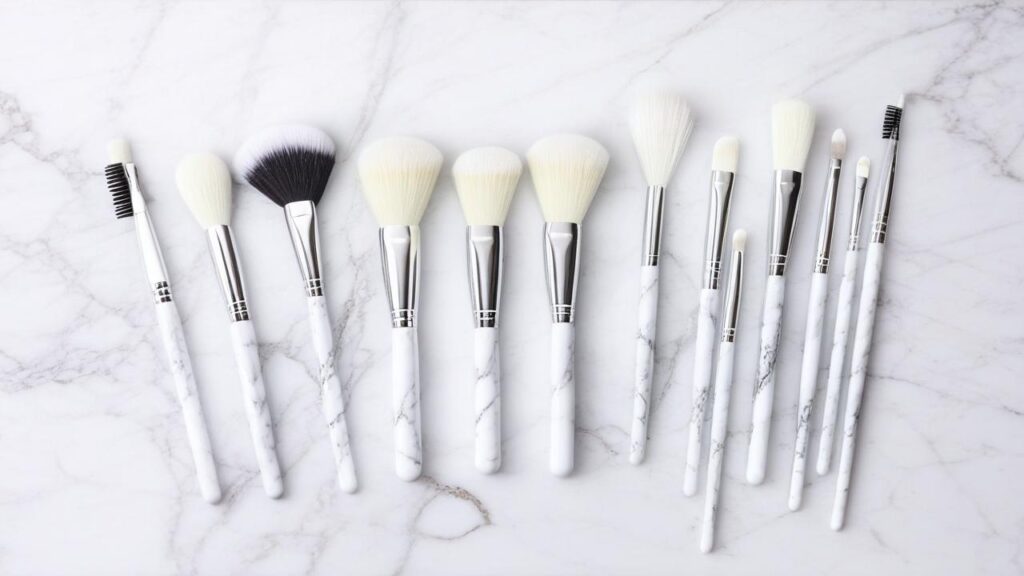
The great thing about contouring is that it’s not very difficult to do. You will need some items, but it’s nothing too complex. In fact, you can use 2 concealer shades, bronzer or foundation. Some even use brow powder or eyeshadow to contour. The trick is to always try to use makeup products that have the same texture. Aside from that, you should have a few makeup brushes that fit the contouring products you want to use.
How can you start contouring your face?
The main goal when contouring my face is to try and enhance the natural shape of the face. I want to make it feel more appealing, while still retaining that unique, natural look as well. Here are the most common steps that you want to go through!
Preparing your face
The first thing you want to do is to wash your face and then you can apply some moisturizer. The idea here is to avoid clumped makeup on your face. You can also use primer if you want, although it’s optional. It does have its benefits, since it helps create a buffer between the skincare products and the makeup items you want to use. After using primer, you can add a bit of concealer or foundation, although make sure the shades you use match your skin tone.
Shadow
Now that you prepared your face, you will need to take darker shades and use those in order to create a shadowy look under the cheekbones. Your facial shape might require you to focus on different lines. In some cases, a 3 shape that follows the jawline, under cheekbone and hairline can be a good idea. Or you can start creating an upside down triangle that frames your cheeks. However, this is not mandatory. You can experiment and try out different shadow lines to see what works for you.
Highlighting
The third step requires you to highlight certain areas. The main focus is to apply lighter shade to those areas that are known for reflecting natural light. These can be around the brow bone and eyes, but also at the top of cheekbones, the tip/bridge of your nose and also your forehead. A good rule of thumb is to always use concealer that’s a bit lighter when compared to the skin tone. If you want, a shimmery eyeshadow, illuminator or highlighter will work too.
Blush
When you apply blush, you want to do that to the apples of your cheeks. Remember this is an optional step, not a mandatory one. However, I feel it does help if you want to have a natural look. If you use this approach, it will be a bridge between your highlight and shadow areas. I think using a little bit of blush is always helpful when you are contouring your face.
Blend
Your skin tone is unique, and most of the time the shades you use won’t be identical to it. Yes, they are similar, but you still need to go through a few things in order to obtain the best results. That’s where I think blending can be a very good idea. A large blending brush or even a makeup sponge can be a great item to have. That will help blend the shadows and highlights. You want to do this because it will make your look a lot more natural.
Finalizing your contour
As you finish the contouring process, a great rule of thumb is to apply setting powder. Some women use spray for this process, which is another good option to take into consideration. In addition, it does help you make the entire look feel more natural. Just like the other processes, you want to avoid using too much spray or powder. It will change your look and shift it away from that natural appeal you want to have.
Other things to keep in mind
I have a few more tips to help you with the facial contouring process. One of them is to keep a matte finish. That’s what gives you a natural result, and it’s definitely one of those ideas that work extremely well. Bronzer works great for contouring too, the only thing here is to not have any shimmer.
I also think it’s a good idea to always consider undertones too. If you end up using tones that are very bright, then you can end up with some issues as the contour will not look right. Always stick with a contouring product that has a color and texture very similar to your skin.
Conclusion
I know how difficult it can be to contour your face and make it look very natural. It requires a lot of trial and error, yet I think these tips and ideas shown above can be very handy. It never hurts to experiment with different contouring products and see what works for you. Once I contour my face, I always try to complete the look with lipstick, mascara or even some additional makeup. The truth is that you have no limit in regards to how you wear the contour, so I always try to customize it and make it feel more interesting and stylish!


I’ve been exploring for a little for any high quality articles or weblog posts in this sort of house
. Exploring in Yahoo I ultimately stumbled upon this web site.
Reading this info So i am satisfied to convey that I have an incredibly just right uncanny feeling I came upon just what I needed.
I most without a doubt will make sure to do
not overlook this web site and give it a glance regularly.
Hey I know this is off topic but I was wondering if you knew
of any widgets I could add to my blog that automatically tweet my newest twitter updates.
I’ve been looking for a plug-in like this for quite some
time and was hoping maybe you would have some experience with
something like this. Please let me know if you run into anything.
I truly enjoy reading your blog and I look forward to your new updates.
Greetings! This is my first visit to your blog!
We are a group of volunteers and starting a new project in a community in the same niche.
Your blog provided us valuable information to work on. You have done a marvellous job!
Its not my first time to pay a visit this site, i am browsing this website dailly and
take pleasant facts from here all the time.
Thanks for sharing your thoughts. I truly appreciate
your efforts and I am waiting for your further write ups thank
you once again.
This web site definitely has all of the info I wanted
about this subject and didn’t know who to ask.
I do believe all of the ideas you’ve introduced to your post.
They are really convincing and will certainly work. Still,
the posts are very brief for starters. May you please extend them a little from subsequent time?
Thank you for the post.
It’s awesome designed for me to have a site, which is valuable in favor
of my knowledge. thanks admin
This post will help the internet viewers for building up new website or even a blog from start to
end.
Als im jahr 1954 Rolex atomar der fünf Messe-Schaufenster die neue Rolex Submariner ausstellte ahnte niemand, dass rund 70 Jahre später
die Ausstellung aller jemals lancierten Rolex Submariner
Modelle wohl mehrere Schaufenster benötigen würde.
Es handelte sich um eine einfache Armbanduhr mit mattschwarzem Zifferblatt, überdimensionierten Leuchtindexen sowie Leuchtzeigern für Stunden, Minuten und Sekunden. Dabei war und
ist die klassische Submariner im Design eher unspektakulär.
Hinzu gesellt sich eine griffige Drehlünette mit deutlichen Markierungen im
Abstand von fünf Minuten. Den Nullpunkt symbolisierte eine
mittig gerichtete Pfeilspitze mit mittig positioniertem
Leuchtpunkt. Die erste Viertelstunde weist weitere Indexe im Minutenabstand auf.
Dieses Gestaltungsmerkmal dient als Orientierungshilfe bei widrigen Sichtverhältnissen. Die ersehnte Aufklärung für die Besucher der Ausstellung brachte schließlich eine kleine Tafel mit die Aufschrift
„Submariner – the diver’s friend”. Anders ausgedrückt: Rolex hatte einen professionellen Unterwasser-Zeitmesser mit Selbstaufzug kreiert, dessen Wasserdichtigkeit dank doppelt gesicherter Twinlock-Krone bis 100 Meter reichte.
Woah! I’m really digging the template/theme of this site. It’s simple, yet effective.
A lot of times it’s very difficult to get that “perfect balance” between user friendliness and visual appeal.
I must say you have done a awesome job with this.
Additionally, the blog loads very quick for me on Opera. Superb Blog!
Thanks for ones marvelous posting! I genuinely enjoyed reading it,
you may be a great author. I will be sure
to bookmark your blog and will come back in the future. I
want to encourage you continue your great work, have a
nice weekend!
I’m amazed, I have to admit. Rarely do I come across a blog that’s both equally educative and
engaging, and without a doubt, you’ve hit the nail on the
head. The issue is something too few people are speaking intelligently about.
I am very happy that I stumbled across this in my search
for something concerning this.
That is a good tip particularly to those new to the
blogosphere. Brief but very accurate information…
Appreciate your sharing this one. A must read article!
Hi just wanted to give you a quick heads up and
let you know a few of the images aren’t loading properly.
I’m not sure why but I think its a linking issue. I’ve tried
it in two different internet browsers and both show the same outcome.
I was able to find good info from your articles.
It’s nearly impossible to find experienced people for this subject, but you sound like you know what you’re talking about!
Thanks
Vormals wurden in diesen Hütten die gefangenen Langusten gelagert.
Sie sehnen sich nach traumhaften Sandstränden?
Hier haben Sie eine große auswahl: Da ist die kleine Cala Son Moll
südlich des Hafens, die Sie ganz bequem über die
Uferpromenade erreichen. Die Bucht ist ausgesprochen kinderfreundlich, sehr gepflegt und zeichnet sich durch ruhiges, sauberes und flach abfallendes Wasser aus.
Die Cala Agulla ist mit einer Länge von 1,5 Kilometern etwas ausgedehnter, vom Hafen aus erreichen Sie den Strand nach etwa 15 Gehminuten.
Am westlichen Ende des Strandes erstreckt sich ein kleiner
Kiefernwald, der an den besonders heißen Tagen wohltuenden Schatten spendet.
Und dann ist da noch die Cala Gat ganz im Osten. Nur rund 80
Meter ist sie lang, aber wunderschön zwischen einem Wald und den Klippen. Vereinzelt ist das Wasser sogar so
weit wie 20 Meter tief! Für Schnorchler und Taucher ist die Bucht ein wahrhaftes Paradies, da sich hier eine Tinten- und Neonfische tummeln. Die Cala Gat liegt
rund 500 Meter vom Hafen entfernt.
you are actually a excellent webmaster. The website
loading velocity is amazing. It sort of feels that you are doing any unique trick.
Moreover, The contents are masterwork. you’ve performed
a fantastic task on this topic!
I pay a quick visit everyday some websites and blogs to read articles, but this webpage provides feature based posts.